A Quick tutorial to re-purpose an old toy box ! Toy Box to Kitchen Bench is an easy DIY and adds not only storage but seating as well [if required]
![A Quick tutorial to re-purpose an old toy box ! Toy Box to Kitchen Bench is an easy DIY and adds not only storage but seating as well [if required] A Quick tutorial to re-purpose an old toy box ! Toy Box to Kitchen Bench is an easy DIY and adds not only storage but seating as well [if required]](https://www.withablast.net/wp-content/uploads/2012/08/Toy-box-to-Kitchen-Bench-a.jpg.webp)
Another piece of the almost done kitchen. We have turned an old Toy-Box to Kitchen Bench !
We bought wooden toy boxes for the kids many years ago. Needless to say, it has also been some years since they’ve outgrown them and threw it out.
I am using one in my bedroom as a foot-end blanket box. Which, so far has only been painted and I added some handles .. this is still an incomplete project, ugh!
The Kitchen Bench will mainly be used for storage. We had this very awkward, under counter space and I ran out of ideas as to what to put there – voila !
I needed to do something with the toy box ! (it holds a lot of craft stuff which I need to use in the kitchen i.e. my candle making stuff).
Because this will be used in the kitchen, I added thick plastic over the material – here is what I did:
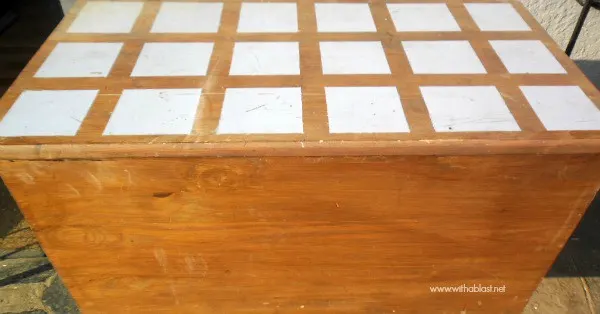
The old toy box.

Toy-Box to Kitchen Bench
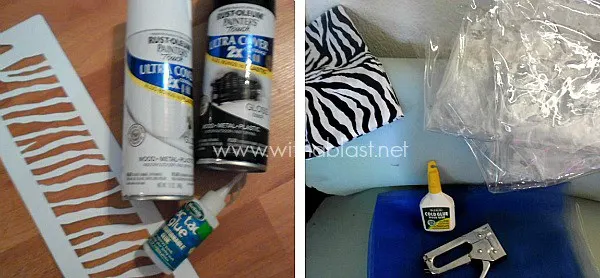
Supplies needed :

1.) Black Spray paint (I used Rust-O-Leum for wood)
2.) White Spay paint for the stencilling (again Rust-O-Leum for wood)
3.) Stencil – I found this “zebra” pattern by chance, after I bought the fabric
4.) Tiny amount of Tic-Tac Glue (to keep the stencil in place)
5.) 10 centimeter (about 4 inch) thick Foam, cut to the exact same size as the top of the lid
6.) Glue – suitable to use on foam and wood
7.) THICK Plastic – I got mine from the fabric shop
8.) Staple Gun
How to turn a Toy-Box to Kitchen Bench :
1.) First, I washed the box and made sure all areas were dry before spraying the four sides with Black Spray paint. 2.) After about three hours the paint was dry enough to do the stencilling – I applied a small amount of Tic-Tac Glue
3.) Waited a minute or two and stuck the stencil in place
4.) Then I spray painted over the stencil with the White Spray paint, all around the bottom of the box
5.) For the seat, I removed the lid from the box and glued the Foam to the top
6.) I Cut the Plastic and Fabric large enough to cover the whole (inside and outside) of the lid. First, I layed down the Plastic, then the Fabric (right side facing down) on top of the Plastic. I then placed the lid (Foam side facing down) on top of the Fabric.
Almost there !
7.) Now, I made sure there were no crinkles at the bottom (the seat side). And then started to just “wrap” the lid, almost as you would do a gift, stapling all the sides and seams on the inside.
8.) We replaced the lid and fastened it to the same hinges as before. (this was a little tricky as we had to feel the covered lid for the holes. Next time I’ll make sure we mark it somehow ! ).

Karima
Tuesday 18th of September 2012
Great transformation! I love doing things like this too!
The Mandatory Mooch
Wednesday 12th of September 2012
Fun project, love the zebra pattern!! Thanks so much for linking up to Tasty Thursdays on The Mandatory Mooch!! I hope you will link up again. The party will be live tonight. http://www.mandatorymooch.blogspot.com
Thanks, Nichi
Debi Bolocofsky
Wednesday 12th of September 2012
Hi Linda,What a great idea. I really like this bench. Thank you so much for sharing with Wednesdays Adorned From Above Link Party last week. This weeks Link Party is opened at http://www.adornedfromabove.com/2012/09/reeses-smore-brownies-and-wednesdays.htmlfrom Wednesday until Sunday.Hope to see you there.Debi BolocofskyAdorned From Abovewww.adornedfromabove.com
The Thriftiness Miss
Tuesday 11th of September 2012
Great reuse! I 'm all for an upcycle :) Thanks so much for sharing this at the Weekend Wonders link party! Hope to see you back on Thursday Have a great day :)
Barbara Hiatt
Tuesday 11th of September 2012
Great job! I have an old chest in my kitchen too and it provides so much storage not to mention seating space! Really great job!Thanks for joining the party at Keep Calm & Link Up!Barbara at Chase the Starchasethestar dot net