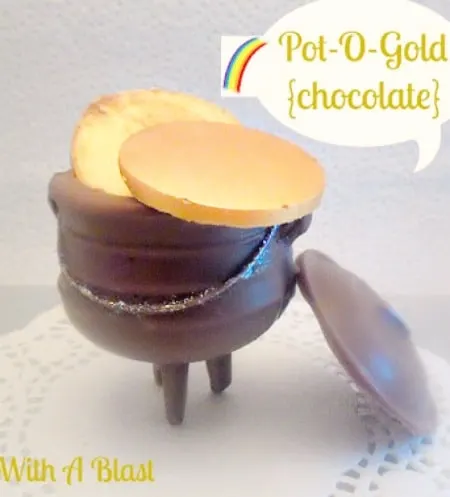
Pot-O-Gold is all edible ! The whole cauldron as well as the gold coins are made with chocolate and edible glitter and powder – perfect and so cute for Saint Patrick’s Day !
ALL edible Pot-O-Gold ! The gold coins and the cauldron (we call it a potjie in South-Africa, by the way) are made of chocolate.
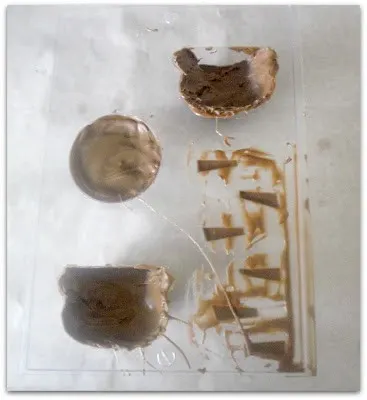
If you follow me here or on Facebook, yep, this is the chocolate thingy which I finished. But when I took it over to the counter to photograph, I dropped it and some of the pieces broke.
I did a silly easy craft instead (just to make me feel better and not so stupid) and only later went to re-do the broken pieces.
Some of these molds are so cute and inexpensive. I always have to buy one or two when visiting our local baking supply store.
I bought this one last year for a project which also never happened because I was too impatient. And when it did not work the first time, I put the mold away until now.
St Patrick’s Day is next month, in case you are curious why I start so soon, and only a few days later we have Easter!
I will be posting recipes and crafts for St Patrick and Easter over the next few weeks. You are warned what to expect … but, the family still needs to eat, so the normal posts will be thrown in as well.
This is what you need to make the Pot-O-Gold:
- Cauldron Mold
- Round shallow mold – for the coins
- Dark melting Chocolate
- White Melting Chocolate
- Edible silver Glitter
- Edible Luster Gold Powder
UPDATE ( February 17, 2018) : I have had a lot of readers asking where I bought my Pot-O-Gold Mold.
I bought mine at a candle making supply store which used to be in Boksburg, South-Africa. You should be able to get them from most craft supply stores as well. Although, I am not sure whether this is a South-African product or available world wide.
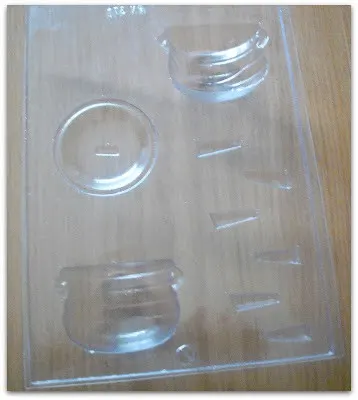
The mold – no need to prep this in any way – just make sure it is clean and dry.
How To Make a Pot-O-Gold:
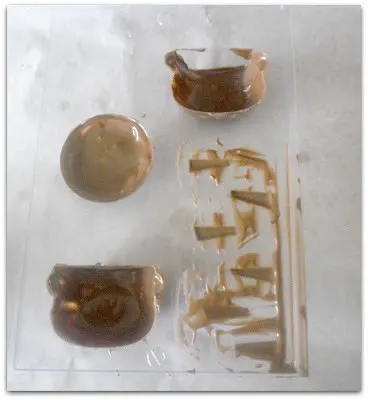
First layer of dark melted chocolate – this does not need to be perfect or cover the inside 100%. Just to get a “grip” for the following layers.
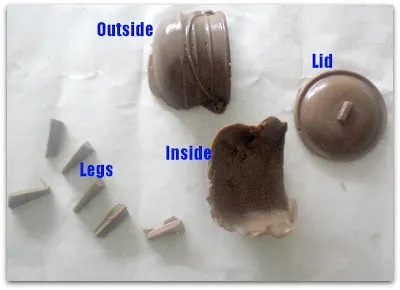
The pieces on the bottom right of the pic are the legs, which are very small and my chocolate had run over, take a knife and slide all the excess chocolate off, so that you have a smooth top.
Place in the freezer compartment for about 2 minutes – remove and repeat twice more – you will notice the chocolate seem to stick better now that the first layer and the mold are ice cold.
After 3 layers it should be enough – do not worry about the cauldron’s inside looks (no-one will notice!), but make sure the lid and legs are nice and even.
Tip the mold over and lightly tap to loosen the chocolate, which will slip out easily.
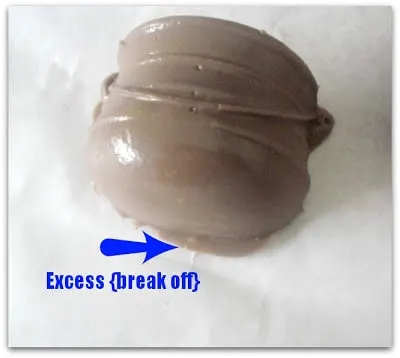
The excess bits of chocolate can be broken off easily to make a smooth edge. Once both the front and back pieces are ready – use a small flame to only JUST heat one side’s edge. Fit onto the other side and hold for at least a minute to two minutes to make sure the edges are sticking together.
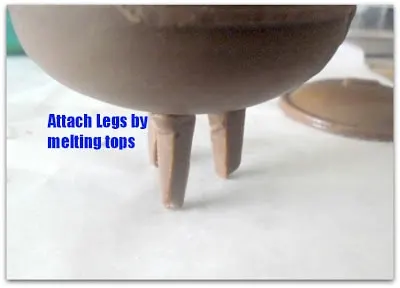
I heated the top pieces of the legs very lightly and pressed them into place – hold it for 30 seconds to a minute and it will be fine.
Finally to finish the cauldron, I used a toothpick, wet the sharp point in water, applied that to the “handle” and the small piece on top of the lid. I then dipped the same toothpick into edible glitter (silver) and painted/highlighted the wet areas.
To make the coins I used a round, very shallow holed mold into which I poured melted white chocolate. Placed in the freezer for 3 minutes to fully set. And then using my finger, works best – believe me!, rubbed edible gold luster onto it.
Pot-O-Gold (All Chocolate)
This is supposed to bring good luck, well, ironically my first batch broke, wonder what that means…
LINDA

Soekie van den Berg
Monday 21st of January 2019
Hi Linda, Can't find the Pot-O-Gold mould anywhere. You could not by any chance remember what the name of the candle store was or the street name in Boksburg. Would like to use it as an invitation to a potjie kos party and it would be awesome to use your idea. . Please if you can help. Thank You Soekie
Marilyn Clark
Tuesday 12th of March 2013
I have never done any chocolate molding like this...these are super cute! Thanks for sharing at March Madness
Natalie B.
Wednesday 20th of February 2013
Cool,Thanks for sharing on Tutorial Thursdays.xNataliewww.marigoldsloft.blogspot.com
Shauna {The Best Blog Recipes}
Tuesday 19th of February 2013
So cute! Love the idea of this for St. Patty's Day!
Thanks for sharing this at my weekend link party @The Weekend re-Treat!
Have a great week :)
Peggy~PJH Designs
Sunday 17th of February 2013
Hi Linda this is so cute and totally edible. Yum! Thanks for linking up at Transformed Tuesday. Hugs, Peggy
Peggy~PJH Designs
Tuesday 19th of February 2013
I'll be featuring you later tonight on TT. :-)